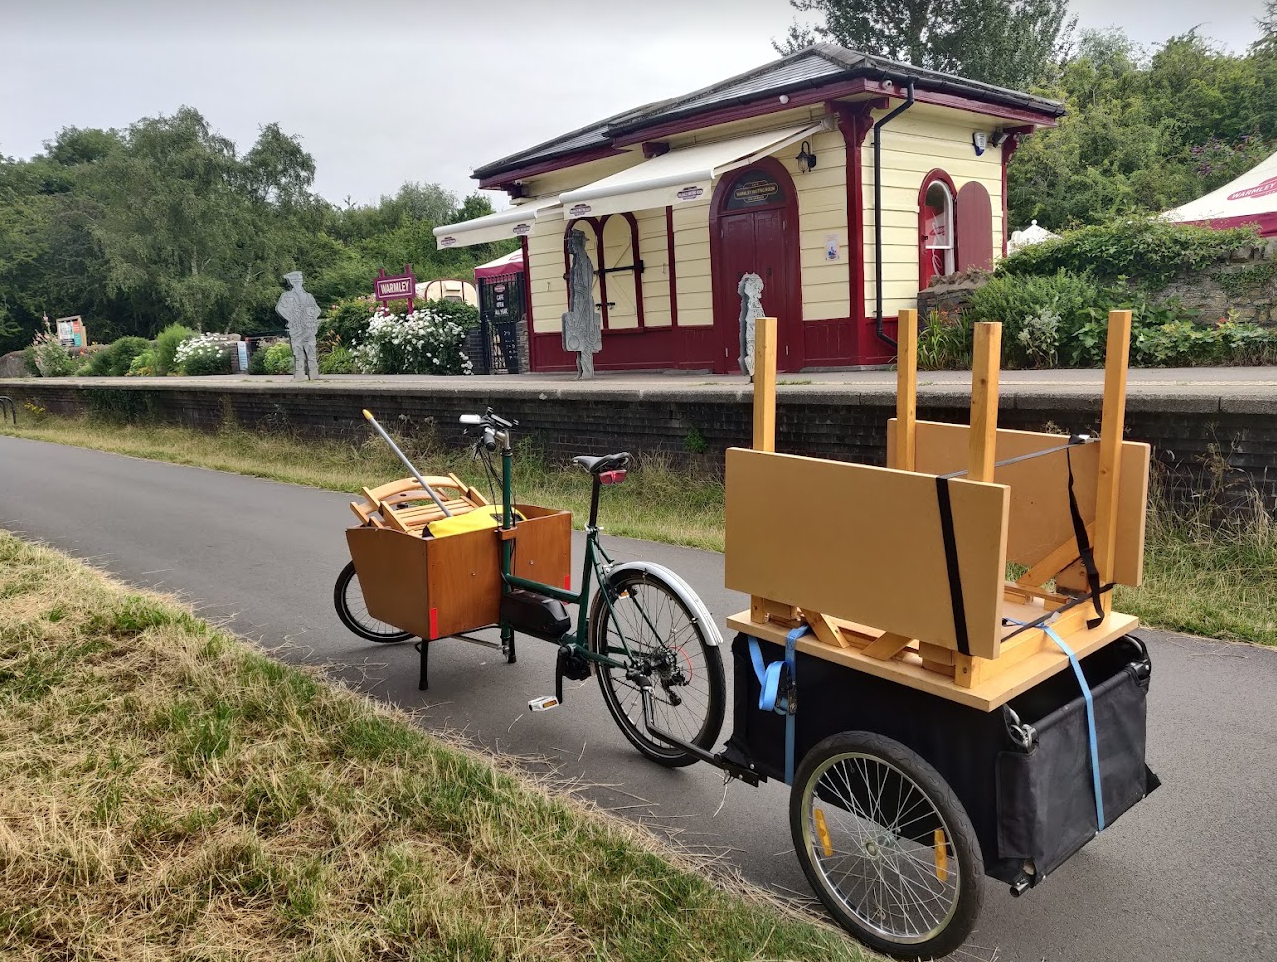
Cargo Bike

Motivation
We live on the outskirts of Bristol, around 10km from the centre, but with one of the best bits of cycling infrastructure in the country connecting us with the city centre: the Bristol and Bath Railway Path. Bus services are the worst in Bristol of any city I've visited in the UK, and driving into the centre is out of scope for many reasons. We also have a medium-sized dog. The solution to all this? A front-loading cargo bike.
Why Custom
The main motivation is financial: a decent front-loading electric cargo bike would start at £5k new - perhaps £3k 2nd hand. Not only is this a problem with initial outlay (my company's Cyclescheme limit is £3.5k despite my best lobbying) - there's also the question of security. A flashy Riese and Muller would be great fun, but I'd be terrified to lock it anywhere - especially in central Bristol - which entirely defeats the purpose of the thing. Insurance is the obvious answer, but what do you do in the 9 months it takes the insurance company to process your claim?
Requirements
I should start this section with some context: we have a ~20 year old car which is "getting on a bit", and also pretty fuel-inefficient. This presents the perfect opportunity to fill the gap it leaves; all short journeys. Saving cycles on the car, and eliminating the journeys where it's least efficient.
The aim is therefore to make the bike as easy to use as a car. No need to pre-consider clothing, puncture repair, or lights.
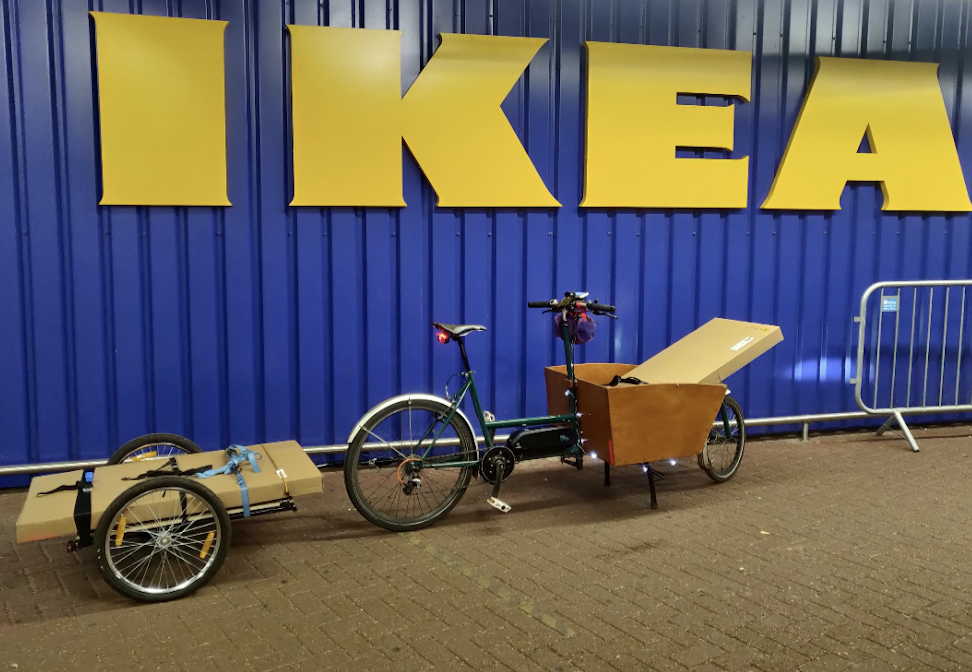
We don't need a box with a particularly high load capacity. Perhaps 30kg should be sufficient for either a dog + dogccessories, or a weekly shop. Anything more - like an Ikea trip - we have a trailer for.
Main Bike
I was originally on the hunt for something like a used Urban Arrow to restore, but soon came across a home-welded steel Frankenstein bike for such a low price that I couldn't resist. It was pretty ugly, but I thought a new box, a motor kit, and perhaps a lick of paint would sort it out.
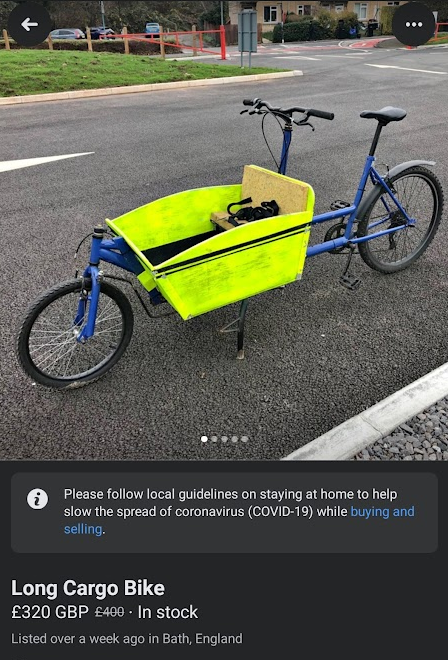
When I went to look at the bike it was cold and dark, and I didn't know what I was looking for. It turned out I was getting myself in for a much bigger project than I had planned.
There were two immediate issues; steering and frame flex.
Frame stiffening and paint
Frame flex was the big one. As it stood, the bike probably could carry a 30kg payload, but it felt a bit high on the S-N curve for me. After some debate, I accepted that some frame modification was required. Luckily my partner's dad is a professional welder - which made this a lot easier than expected.
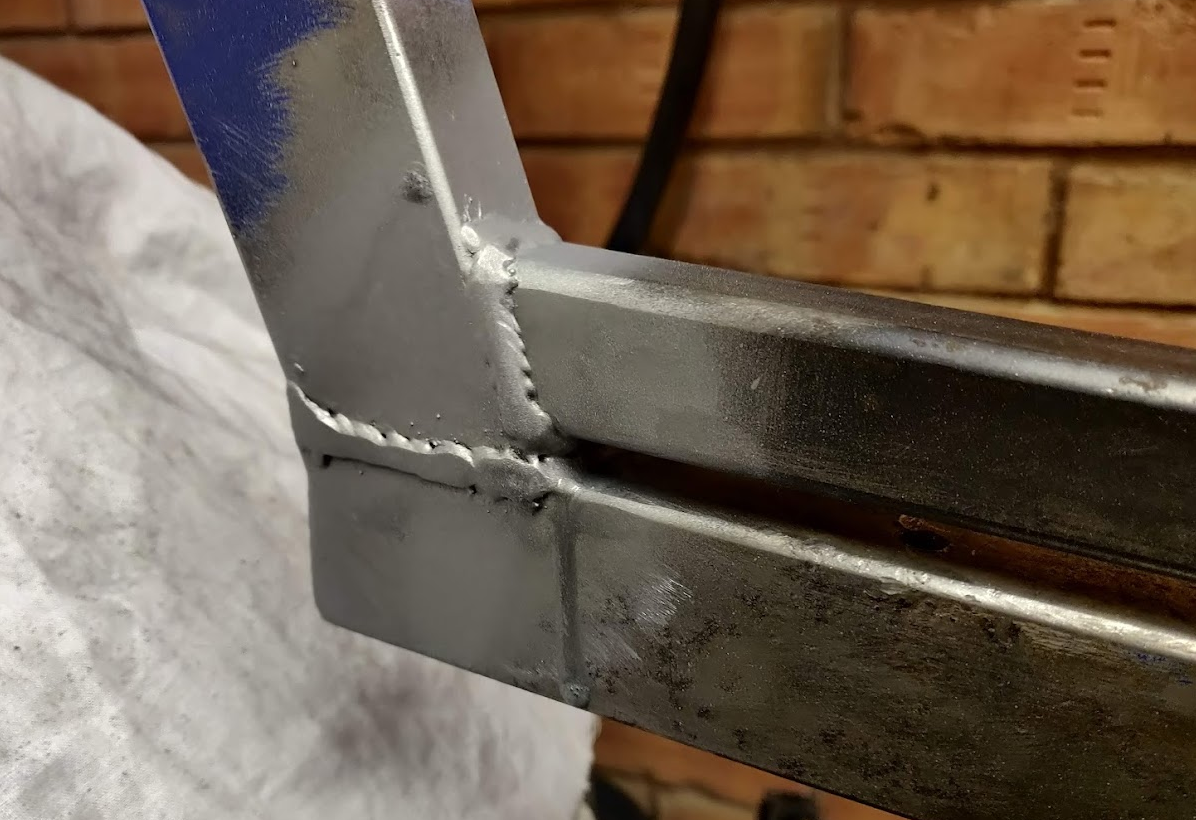
The paint was a bit scruffy anyway, so I stripped it (discovering in the process that all the nice smooth welds were actually body filler; should have seen that coming) and mitred a bit of 1" box section to double the second moment of area of the under-box tube; perhaps a tandem-owner would call this a keel tube? It made a huge difference.
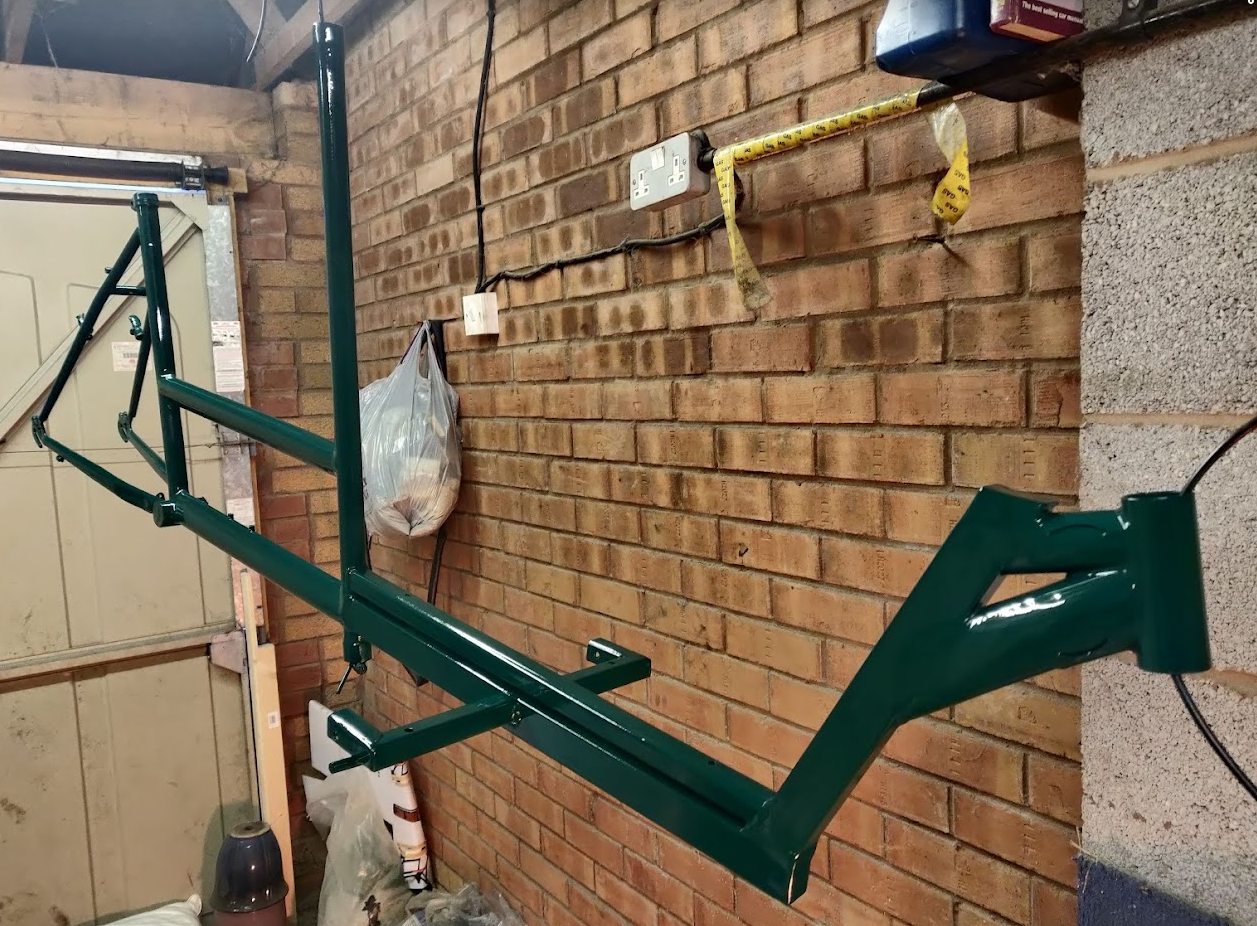
For the paint, I went with a Isocyanate-free two-part paint based on HMG Nisocoat. I sprayed it in my garage with an FFP3 mask (think this is ok?) and the finish was surprisingly good and hard-wearing. I would recommend. My only regret is not lacquering as the paint appears quite flat, but this is supposed to be a practical machine so I can live with it.
Steering
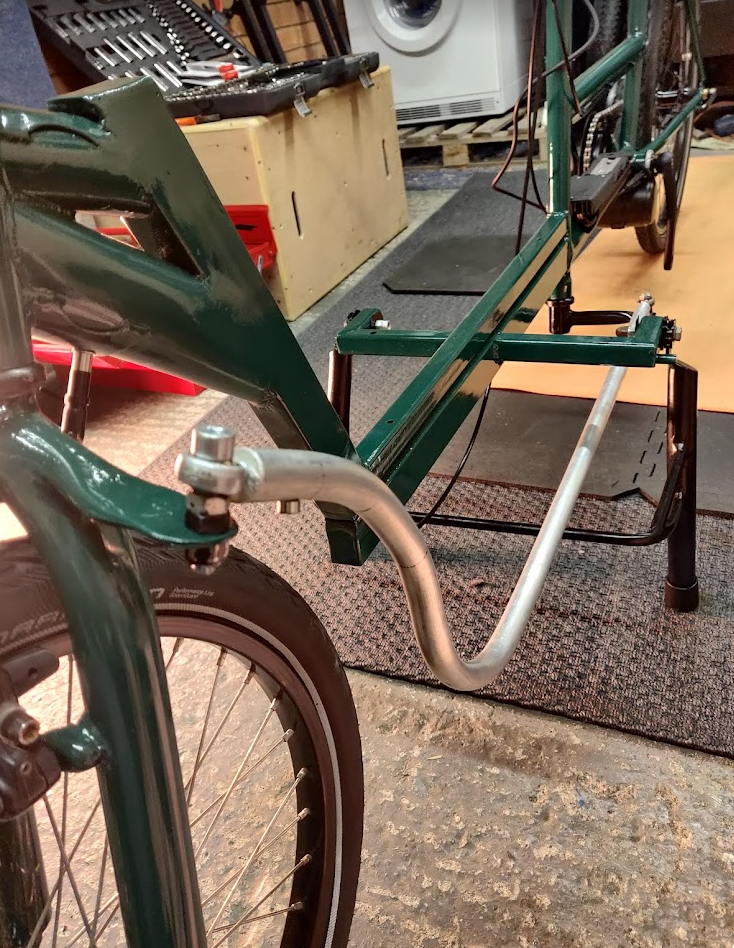
Next job was the steering. The existing bike has a long steerer tube running through the rear headtube, which is linked with a pushrod to the fork. The existing pushrod was a 3/8" solid steel rod, which, due to the kink in the pushrod required to get around the box and the deflected front wheel, had significant flex which made the bike far more tricky to ride than it needed to be. This was improved in two ways. Firstly replacing it with a 3/4" aluminium tube (bent using some 3d-printed dies and a bench vice) - which quadrupled the bending stiffness. Secondly, extending both lever arms to reduce the force seen by the rod. It's helped a lot, but it's still not perfect. I one day intend to brace the pushrod at the bends - most mass-produced cargo bikes I've seen seem to have this.
Brakes
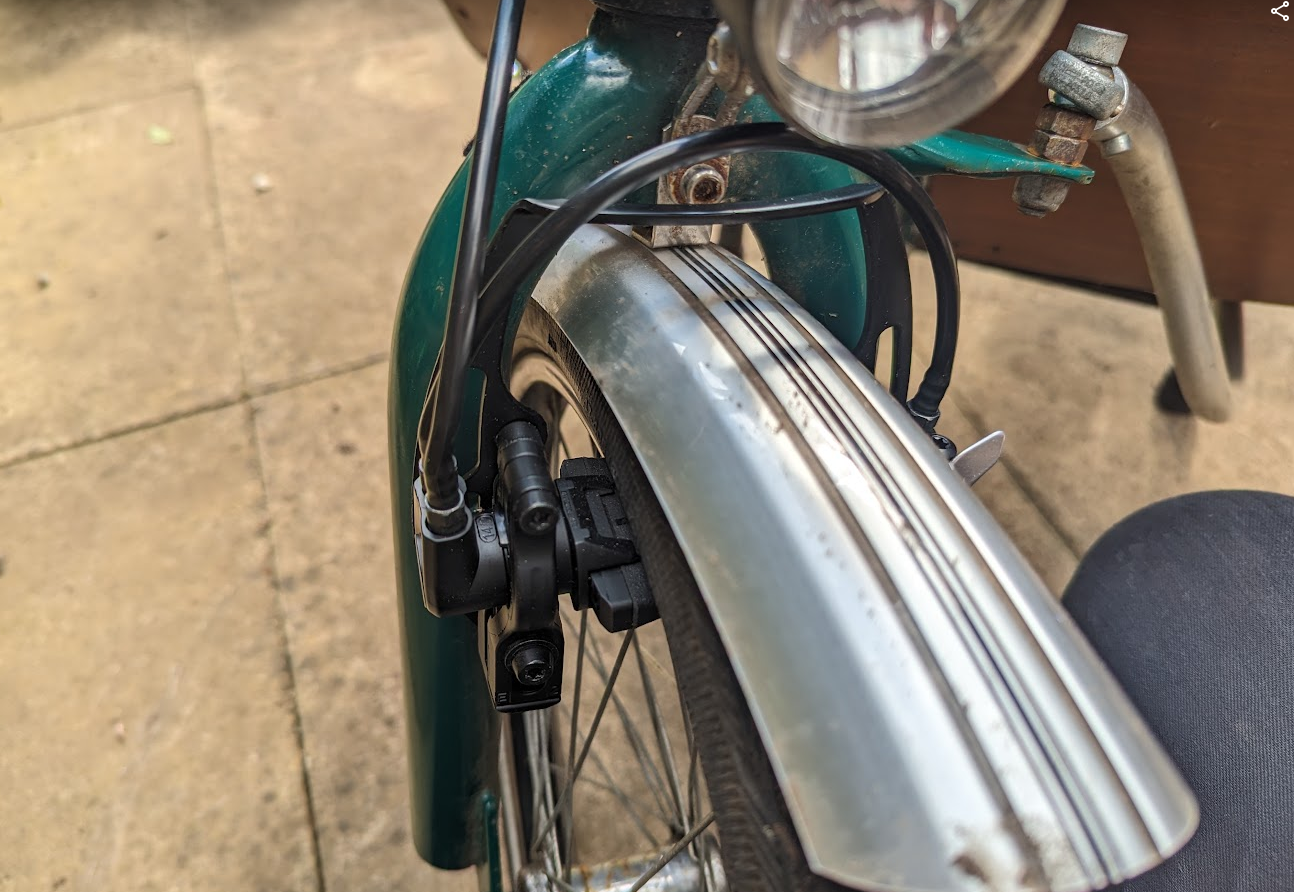
Initially I serviced the standard vee brakes, and ran these for a couple of years. I've recently (mid-2024) replaced these with Magura HS11 hydraulic rim brakes and wish I'd done it from the start. They're far more powerful and modulatable, especially given the long and twisty cable/hose runs. Given the huge mass of the bike, I'm a firm believer that rim brakes actually make more sense than the discs you'll find on most cargo bikes - especially when I venture out into the countryside near Bristol where steep, long descents are unavoidable. They're also more robust to the daily abuse that a cargo bike sees.
Box
I was always planning to replace the box - primarily for aesthetics. I made a box of waterproof 12mm ply and some softwood for the corners. It's probably overkill, and adds unnecessary weight, but it's nice and robust. It's attached with rivnuts into bits of the frame that looked low-stress by eye. No problems yet.
I've mounted some hefty eye-bolts to the inside corners for securing loads, which are pretty much essential. You can happily crank down on these with a ratchet strap to secure your tumble drier or Christmas tree.
I wanted the box to be fully weatherproof, coated it thick in yacht varnish and sealed the gaps between panels with sealant. I also didn't put any drain holes in it. This is usually good because it keeps the inside of the box nice and clean, but it does mean if you get caught out in heavy rain without the cover (more details later), the box fills with water surprisingly quickly. No leaks though!
Electrification
Motor Choice
I should say from the start that unlike many similar e-bikes you see out in the wild, I wanted to keep this legal. The 250W limit seems reasonable to me for an unregistered electric bike, even if I do wish the limit was 30kph rather than 25kph. Sadly, the UK doesn't have a category for S-pedelecs like more developed countries. In the Netherlands for example, you have two choices of e-bike: an unregistered class similar to the UK with a 25kph limiter fitted, or the S-pedelec category which allows you to up the limiter to 45kph in exchange for a very small number plate and insurance which I'm told is cheap. You're still allowed on bike paths, but you have to promise to keep it to 30kph. Seems like a good compromise to me - hopefully one day we'll get something similar here.
Mid-drive systems seemed a bit more refined, and I thought the benefit you get from gearing would be useful. For mid-drive systems the two big contenders are Bafang and Tongsheng. The former tend to be high-power, and don't have torque sensing, whereas the latter does - so that's what I went for. I'm very pleased with the torque sensing. Even at maximum setting (where it multiplies your power by something like 15), it feels pretty natural and easy to control. You can easily ride along with other people and control your speed nicely.
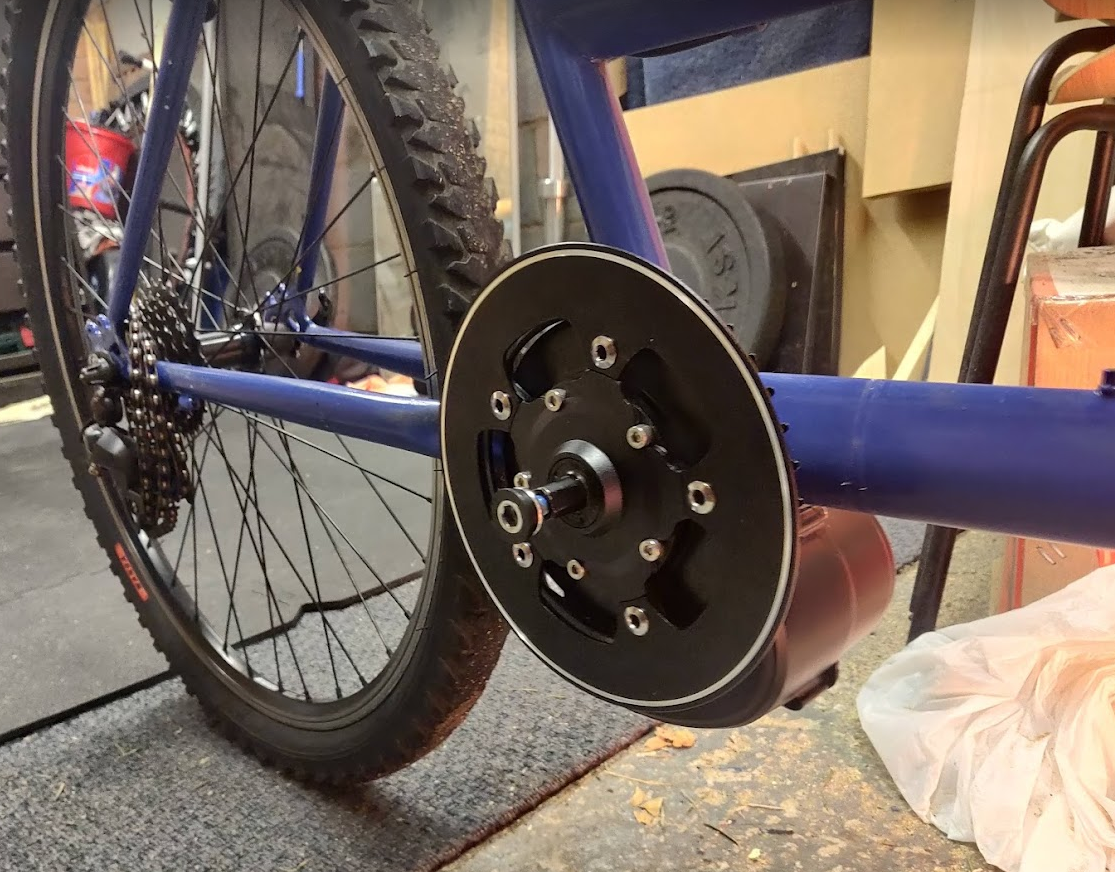
I didn't appreciate quite how good the torque sensing was until I upgraded my Brompton with a Swytch Kit. The Swytch kit doesn't have torque sensing, and like the Bafang would, just gives you 250W when you rotate the cranks. The Swytch Kit has a hideous lag too - I reckon I normally get 3 pedal revolutions in before it kicks in, which makes both manoeuvring at slow speed and riding in traffic much harder.
What you do miss with a mid-drive system compared to a hub motor is the possibility for regen braking, which might be quite useful for saving the brakes on long descents.
Some people have trouble with the nylon gears in the Tongsheng motors. I've not had any such trouble yet at 3000km. The only issue I've had is that the paint is flaking off the cast aluminium motor housing, but it doesn't bother me too much.
Battery
My goal was to be able to make it to my parents house and back - a mildly hilly 60km round trip. It's quite difficult to predict e-bike range, but I had a go based on a bit of road cycling experience and knowing what different amounts of power felt like. I reckoned that to get 25kph, I needed around 200W continuously. With hills and starting and stopping, average speed would probably be more like 20kph. So I needed 3 hours at 200W. 600Wh. With a bit of margin, the 720Wh 36v battery option seemed just right. Battery capacity is a bit subjective depending on temperature, load, and most crucially whether the battery manufacturer sets charge and discharge limits in healthy, safe places. I bought a battery of Samsung 18650s with what sounded like a pretty good BMS with all the key protections: over-charge, over-discharge, balancing, and over-current/short-circuit.
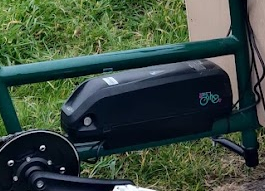
I've been really pleased with the battery too - range is pretty much exactly as expected. You could probably get the range down to 40km with a trailer and very very hilly route, but in and around moderately hill Bristol with average loads and stop-startiness it's consistently 60km+. Think you might get 80km on a nice flat route on a good day. All of this is in "Turbo" mode, which it pretty much lives in - which is manageable thanks to the torque sensing. Again, a hilarious contrast to the Swytch "Max" kit which is comparable in price but only comes with a 180Wh battery that they claim 30km range on. In reality for me it's 20km if you're very careful, or 10-15 if you ride it on the speed limiter (which is a more comparable use case to the cargo bike ranges I've mentioned). So the cargo bike comes out at ~9-18Wh/km, which is exactly the same as the Swytch Brompton. However, the Brompton has much less rolling and air resistance. I personally don't believe Swytch's advertised battery capacity is in line with their battery protections.
For a bit more context, the most efficient electric car on the market is the Tesla Model 3 which has a claimed energy consumption of 133Wh/km. Apparently 175Wh/km is more realistic for the average BEV. 10x the average cargo bike consumption on a bad day, or nearly 20x on a good day.
Anyway, the battery is great and it's never really held us back. We don't even bother charging it after a single trip into Bristol.
Wiring
The problem with pretty much all retrofit e-bike kits is the messy wiring. I did my best to keep it neat. One thing that's helped a lot is a 3d-printed battery brace that fits the shape of the keel tube and braces the battery to make it more secure, and also hide quite a lot of the wiring:
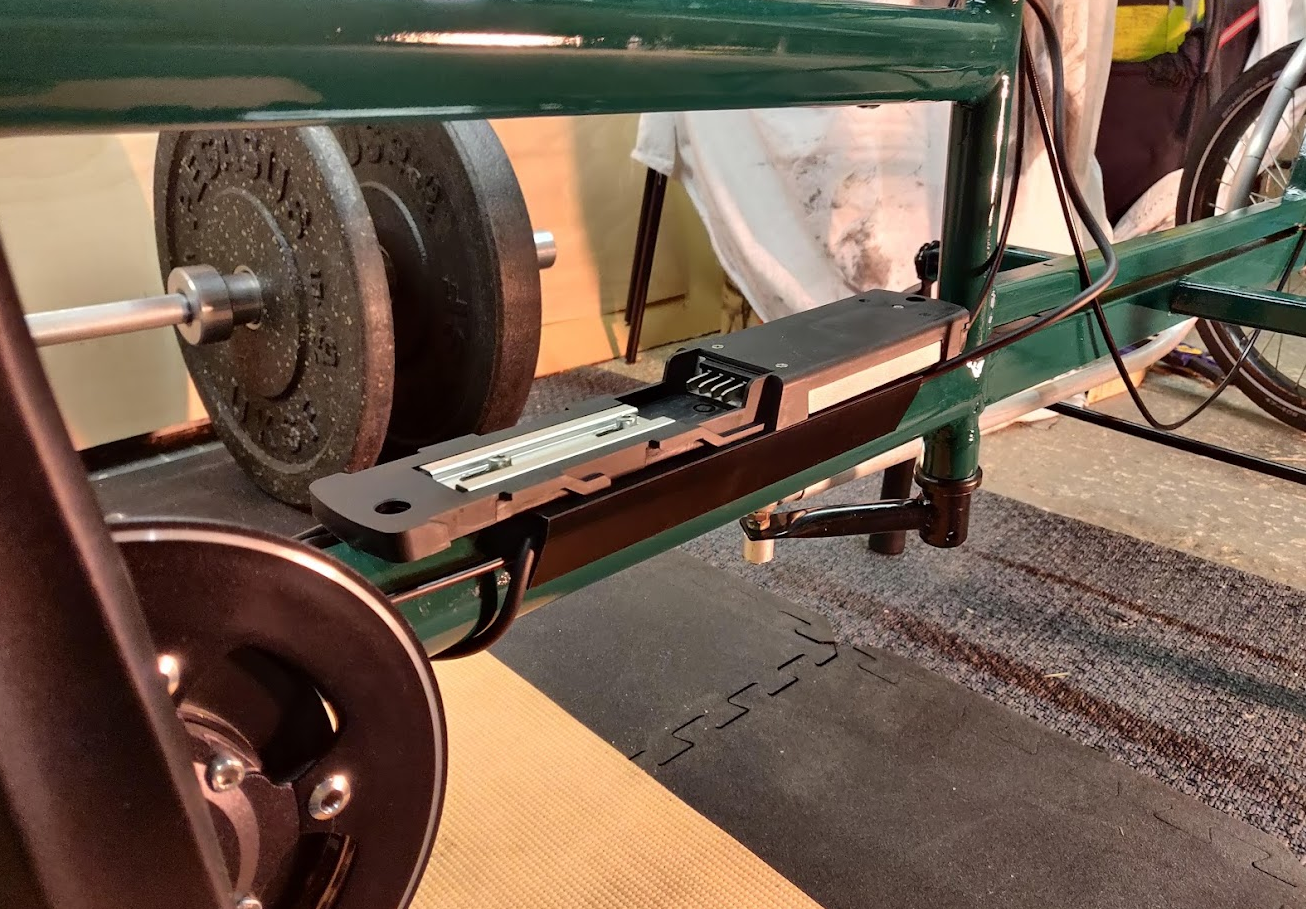
I also did some of the wiring internally, most notably the saddle-mounted rear light (I'll talk about the lights later). The wire enters the seat tube at the bottom and out the top of the seatpost. Within the seat tube, I used a coiled cable to allow for saddle height adjustment.
I also got away with hiding a lot of wiring underneath the main box, including the 36v-12v DC-DC converter which powers a few of the accessories.
Gearing
I've been on a bit of an adventure to get to a setup that works nicely here.
The bike came with a very budget Shimano dérailleur, 6-speed grip shifter and 14-28 tooth cassette. I immediately changed the shifter for a trigger shifter (big improvement), but still had lots of issues shifting and with chain slip. I soon changed to a Sora dérailleur (not technically made for 6 speed but they all have the same cable pull ratio!) which was much better, due (I think) to the stiffer body. Replacing the freewheel fixed the chain slip, although I needed the destructive method to get the old freewheel off.
Initially, I went for another 14-28 6-speed freewheel. When this wore out after a couple of years, I took the opportunity to upgrade to a 7-speed 14-32 freewheel and 7-speed shifter. A nice upgrade that helps on the really steep hills.
With the standard 42t chainring, this works perfectly. Top gear tops out at just over 30kph which is plenty for this bike, and with the motor I'm able to get up even the steepest local road comfortably.
Stand
A solid centre stand is pretty much essential on any cargo bike to enable loading and unloading. The previous owner had welded up a very solid one which only needed a lick of paint and some new rubber feet. The stand is held up with the friction of the bolts. This mostly works, but isn't perfect as I need to tighten the bolts once a year or so. Commercially-produced cargo bikes usually have a sprung stand which has the benfit of automatically folding when you push the bike forward off the stand. Springification is on my to-do list!
Steering Damper
Steering dampers are very common on cargo and utility bikes. Their primary purpose is to stop steering resonance. Steering resonance can be a problem on all types of bikes, but it can usually be designed out with geometry adjustments. The case of a cargo or utility bike is much harder to design for even for a fully optimised and modelled product because the range of loads on the front wheel is so large. The secondary benefit is that it keeps the front wheel and handlebars from slamming to one side when you use a centrestand.
For a year or so, we used the bike without a steering damper. It was mostly fine other than when riding with very heavy and stiff (well-secured) loads which had a forward CoG. The steering would develop a resonance at around 25kph. It was never a problem with a dog or shopping, and manageable by going a bit slower when carrying really heavy stuff, but eventually I cracked and splashed out on a Cane Creek Viscoset.
The Viscoset is a direct replacement for the headset, and features a tuneable viscous damper inside. It's a bit like a 10-plate clutch, but the damping comes from viscosity of grease between the rotor and stator plates rather than friction. You can tune this friction by changing the stack order of the plates (and therefore changing the number of plates with relative movement). The more plates that you stack alternating-ly, the more damping you get. More damping is better for high-speed, but it makes the bike feel harder to handle at low speeds. I have it set very low; only 2 out of the 10 plates have relative movement; and this has solved all the problems. It was pretty much impossible to ride no-handed before, but it's easy now.
Accessories
As I said earlier, the ultimate aim of this project is to get a bike that's as easy to grab and go as a car is. A few accessories really help with this.
Box Cover
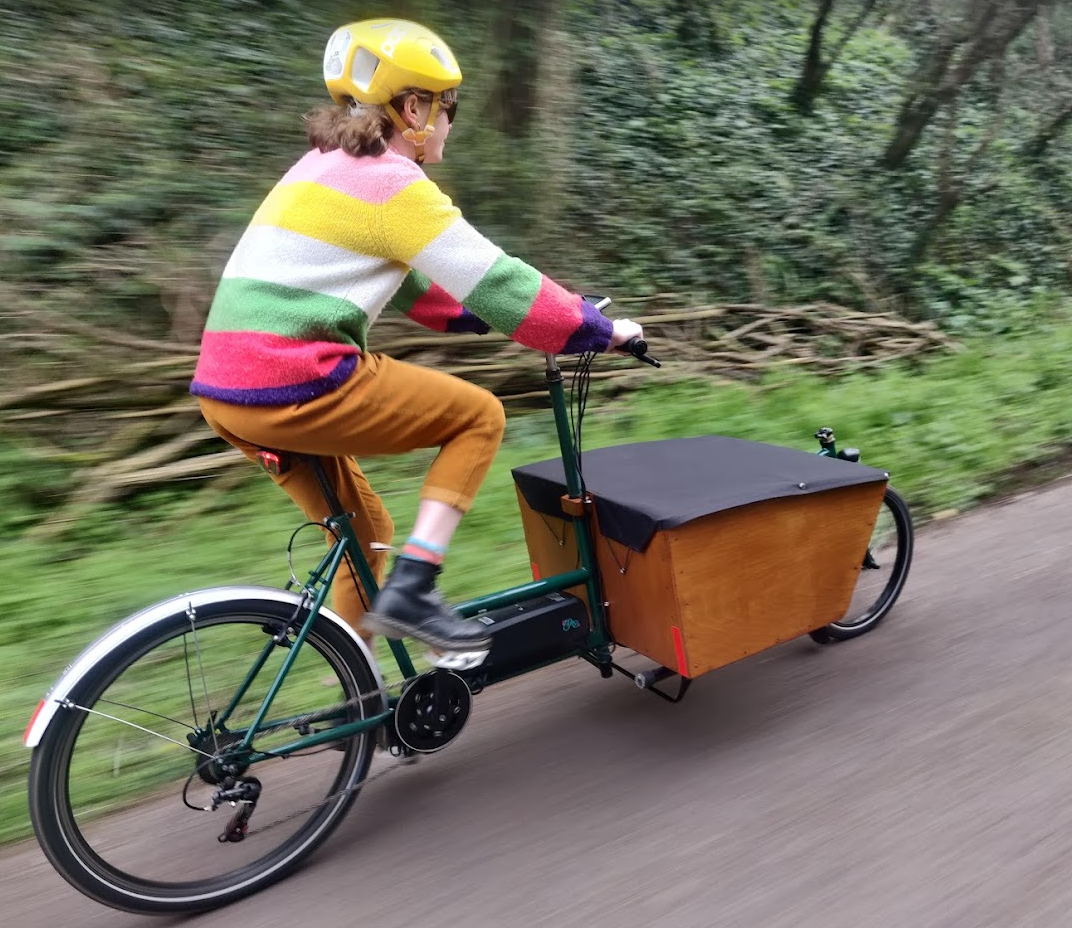
The box cover is essential for rainy day shopping. Made out of PVC-coated 600D Polyester, stiched and glued to form the outer lip. It's secured with poppers around the front and sides, and with elastic at the back to keep it tight. The elastic pulls on a steel rod that's sown into the fabric.
The flat top nature does mean it collects a small amount of water if left parked in the rain, but the frabric is fully waterproof and taut enough that it never seems to be a problem.
Mudguards
Mudguards are essential to keep your normal-person clothes dry.
As you may have noticed, this bike has one 26" wheel and one 20" one. Funnily enough they don't sell a mudguard set for that. I bought a set of SKS 26" 'guards and hacked the front one a bit to make it fit. Good enough is good enough, as they say.
Originally I'd added a flap to the front mudguard which kept everything even drier, but it got ripped off in an unfortunate incident with a curb and I've not got around to replacing it yet.
Puncture repair
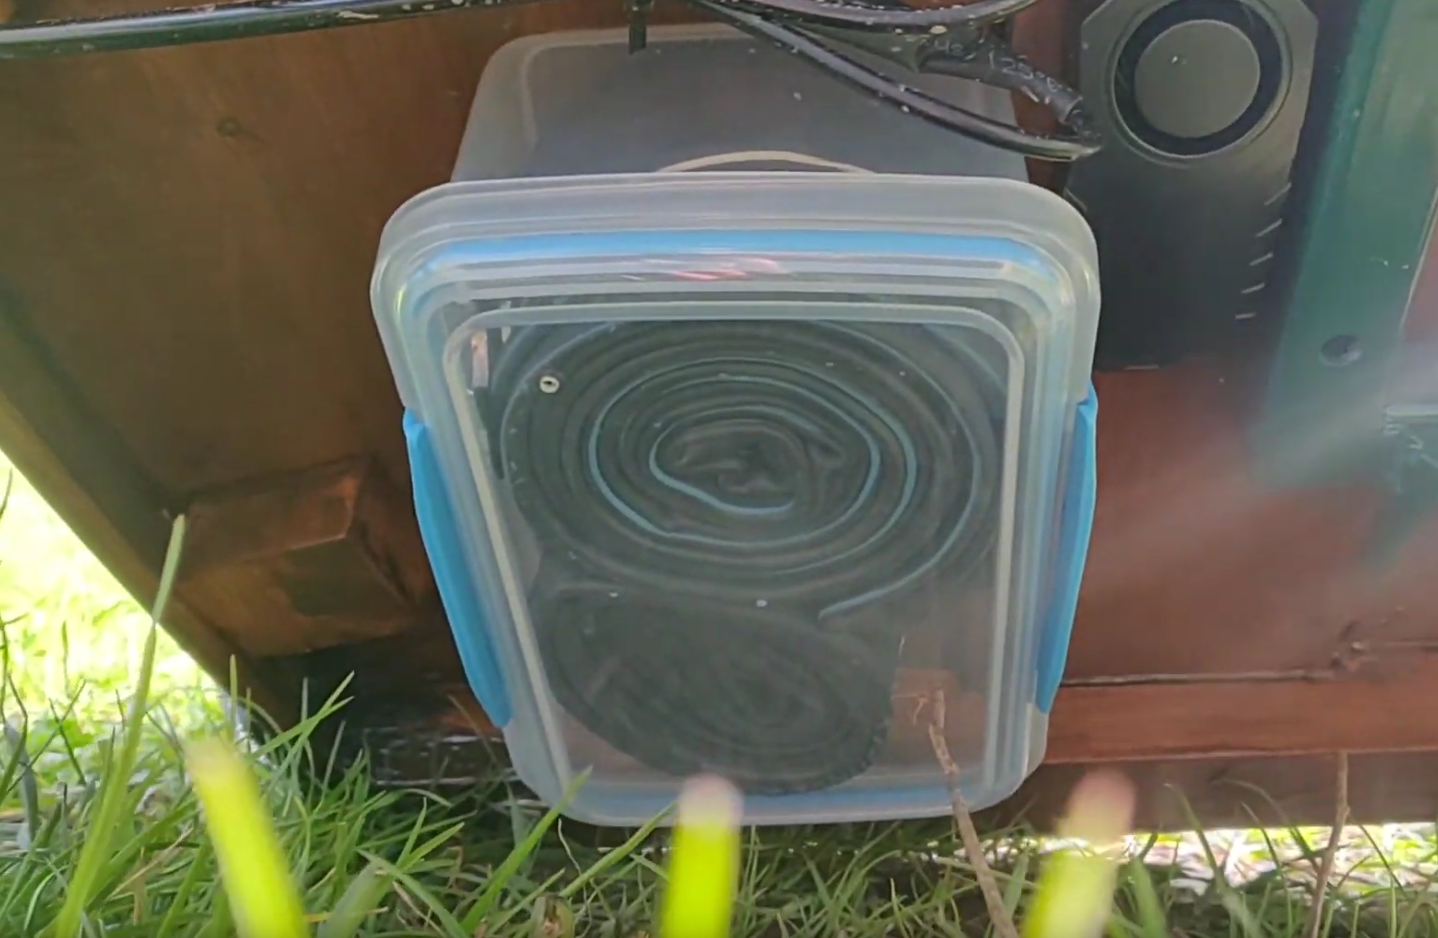
Nobody wants to be having to remember a puncture repair kit and pump when they pop to the shops, so both are hidden under the box and left there permanently. The pump is screwed on with its mount, and the puncture repair kit is in a tupperware that's screwed on to the bottom.
Lights
When I bought the motor kit, I paid something like £12 extra for the light kit. This connects to the motor controller / head unit, and the 6v front and rear lights can be controlled by the handlebar buttons in sync with the screen backlight, which is pretty nice.
The lights are ok, but I wanted something a bit extra for busier roads. I wasn't sure how much extra current the motor controller could provide over the 6v output, and it's also quite difficult to get 6v lights. Plus more wires connected to this increased the risk of a wiring fault and short circuit which I was worried could fry the controller. As a side note, I assume the reason they use 6v for this is that traditional dynamo lights run on 6v RMS AC. I assume therefore most dynamo lights should work on the 6v DC supply.
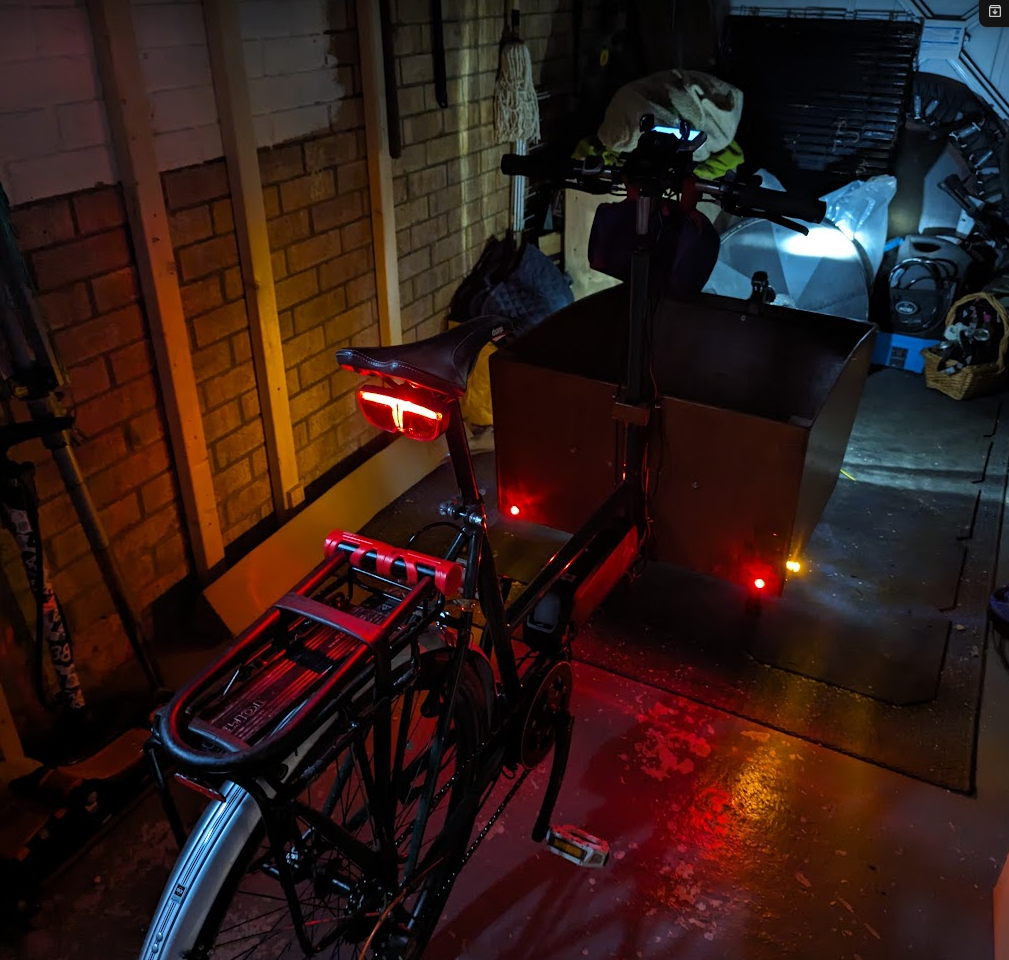
I decided to add a few extra lights to the front, sides, and rear of the box - white, amber, and red respectively - with a relatively inexpensive set that I think is designed for automotive trailers. Of course automotive generally means 12v. You can get 24v lights readily (HGVs use a 24V system), but not 36v. So to make these work I needed a 36-12v DC-DC converter. I went for a buck converter as they have pretty good efficiency - cheaper converters just throw the extra voltage away as heat via a voltage divider and feedback loop. I found a fully waterproof 45W one which I think is designed for RC car or plane applications. These are quite hard to come by; at one point I thought I was going to have to build my own. The buck converter is powered directly from the battery via a 2A fuse on the 36V side. Seems a bit overkill for a few mW of lights, but I already had plans for the following two items...
Phone Mount and Charger
Originally I used a standard handlebar phone mount, with no charging. The motor kit does have a USB-A output but I was always a bit scared to used it in case either it wasn't cut out for the 3A that modern phones pull over 5V, or water ingress or a short fries the motor controller.
Phones these days are almost all waterproof and wireless charging. Perfect for using for navigation, which really adds to the "get on it and go" philosophy. There are plenty of phone mounts that take advantage of this designed for motorcycles. Now that I have a 12v supply, this works perfectly. Slap your phone on and go.
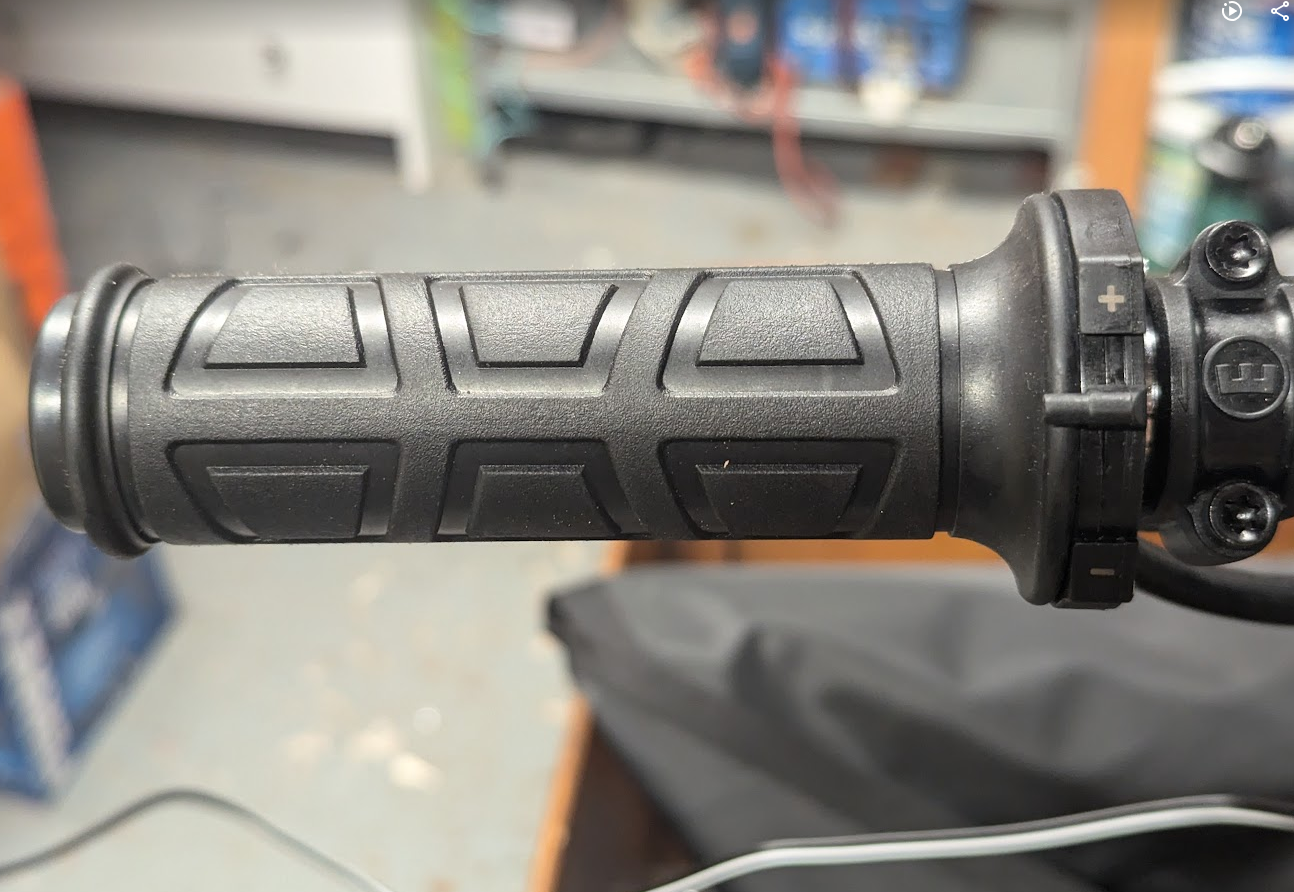
Heated grips
This is probably the most extra bit of the built. In winter, gloves are a faff if you're just popping to the shops. These are a recent install so I've not tested them in anger yet, but on the highest setting they get too hot to hold. They also consume 40W at full power, so need to turn them down when also charging to protect the buck converter, but what luxury. Just like an R1200 GS.
Summary
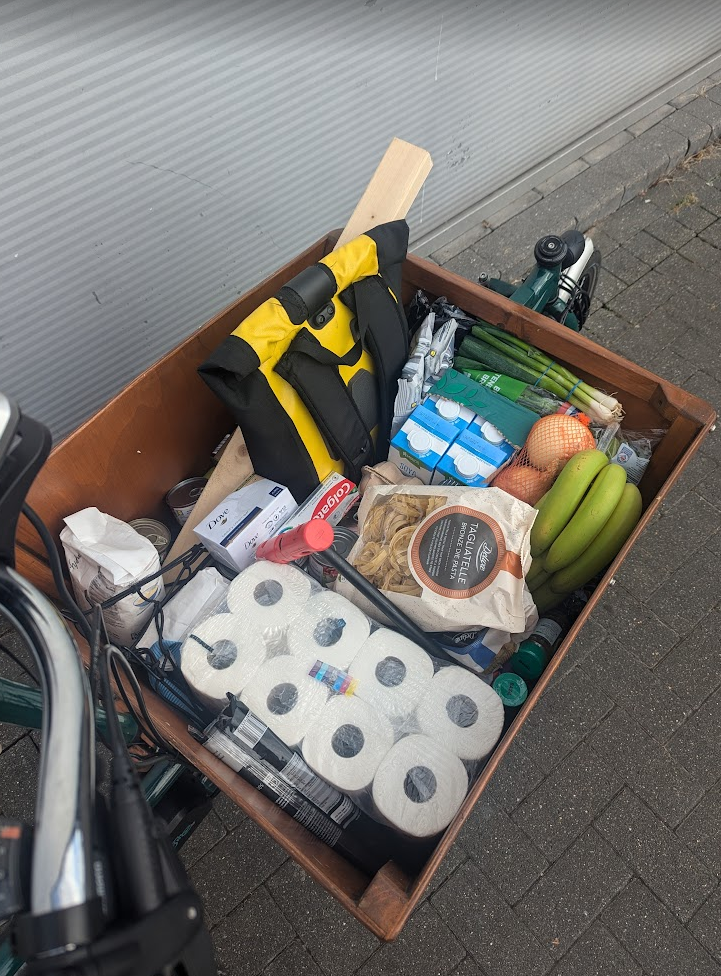
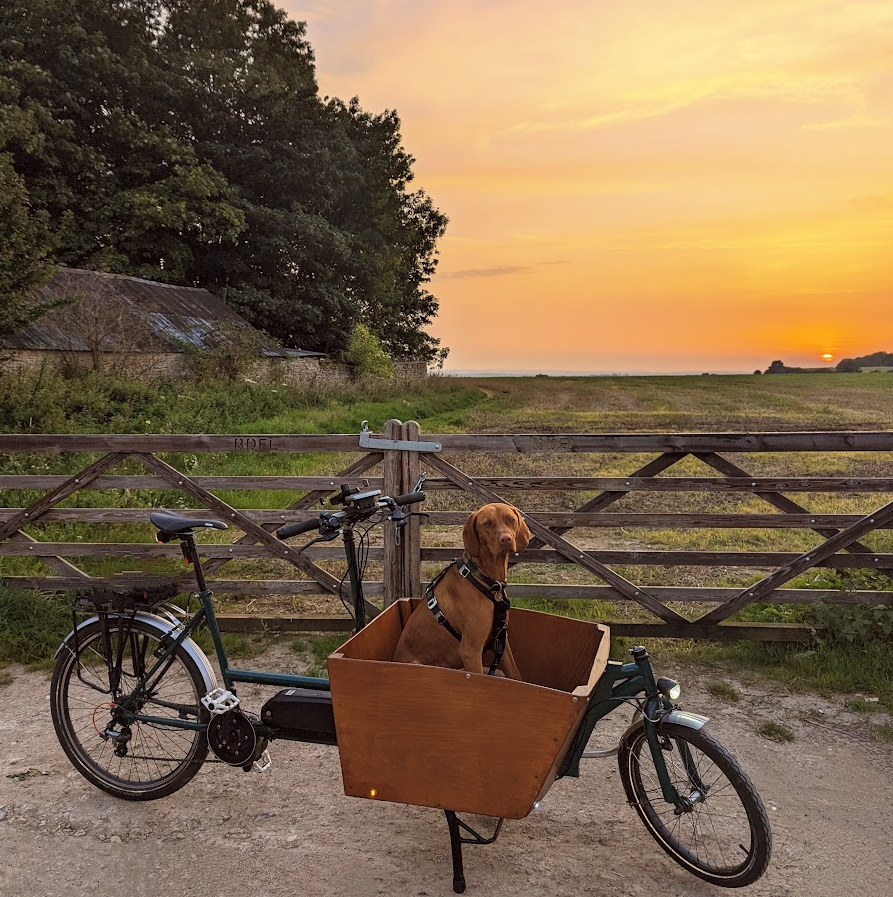
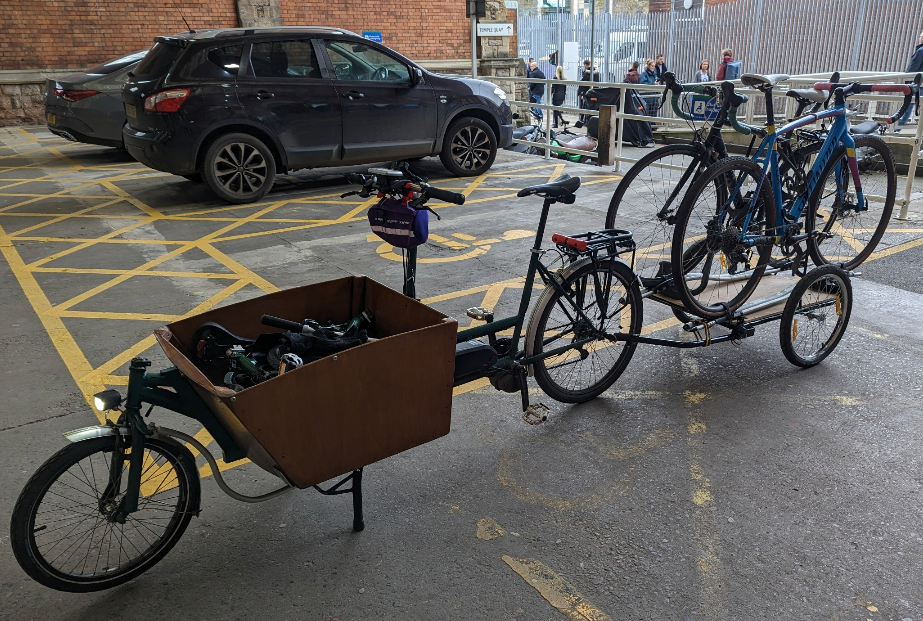
That's all. This bike is a genuine replacement for a second car, and even out-hauls one in some circumstances. Evidenced below, in increasing levels of ridiculousness
Doing the weekly shop
Taking the dog to the pub
Picking friends up from the station
Taking a BBQ to the park

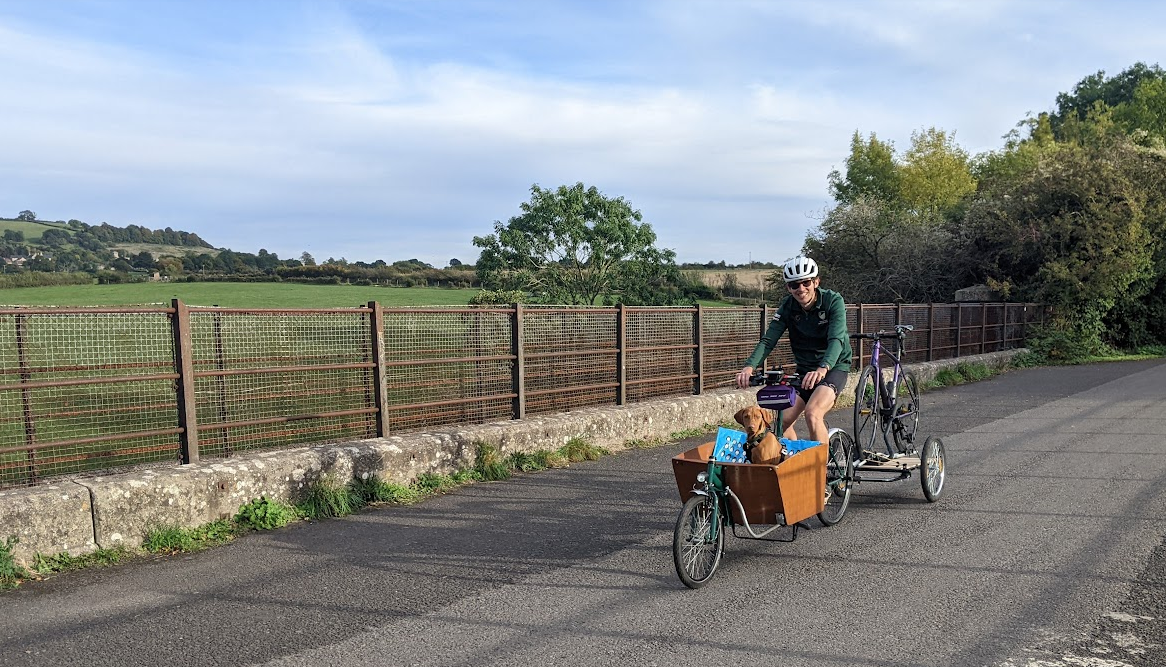
Going to a bike race with the dog
Buying a chest of drawers
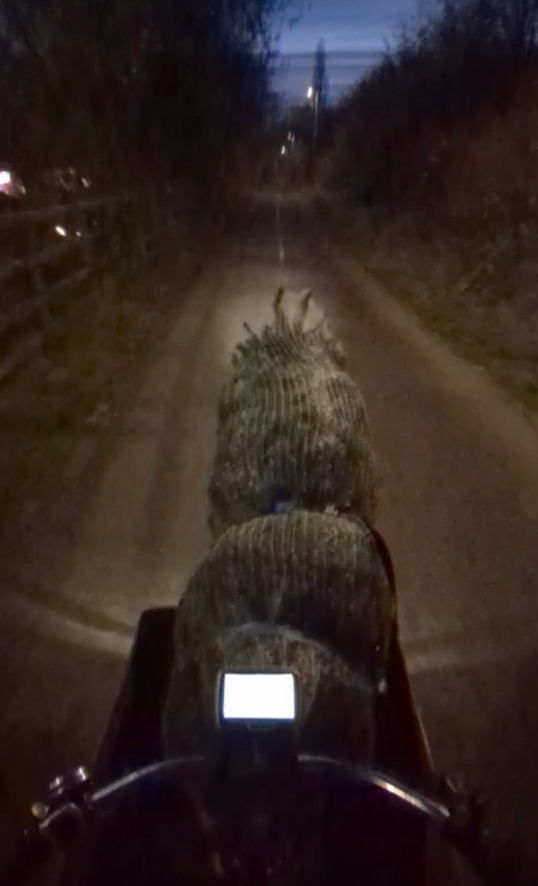
Getting a Christmas tree
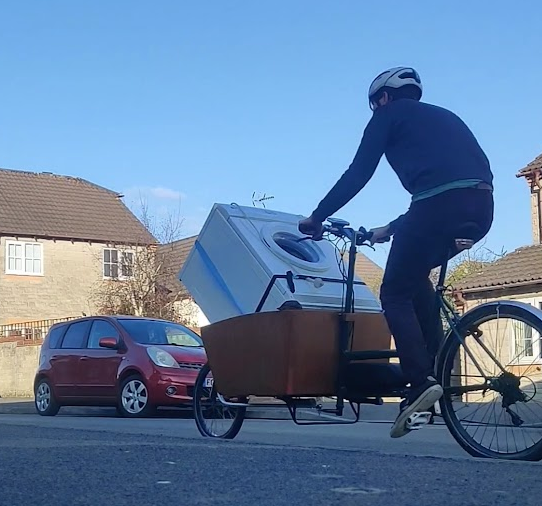
Moving white goods (the point at which we overtake the practicality of a car)
Moving house
